The next two sections describe how to display one spectrum and then how to display many spectra. If you’re new to SPLAT-VO then do take the time to read these through and try out the example commands.
To start SPLAT-VO you should just need to type the command:
This assumes that you have SPLAT-VO installed on your system as part of a standard Starlink installation. If not then you’ll need follow any installation and pre-startup instructions that you have before using this command.
When SPLAT-VO appears it should look something like:
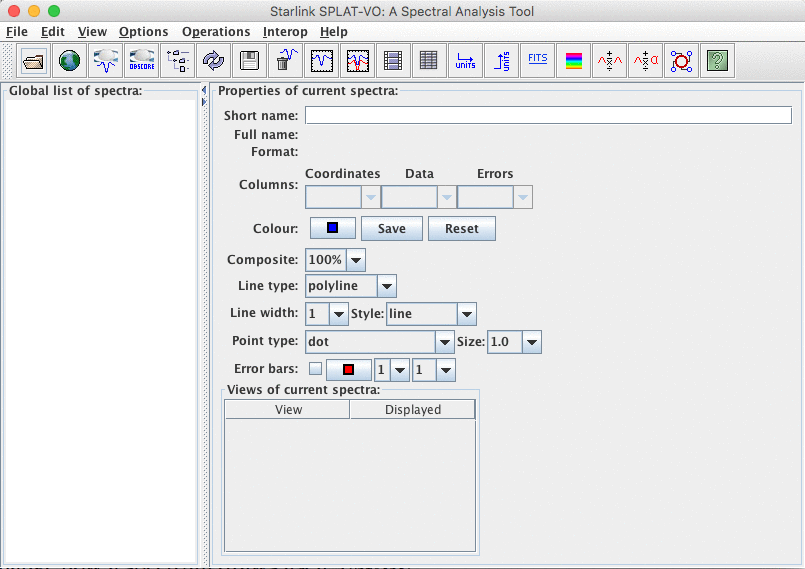
This is the main browser window. It has a list containing all the available spectra (in what we call the
‘global list’, but has been traditionally referred to as the ‘stack’). Using this window you can add, save
and remove spectra from the list, you can change how a spectrum draws itself, in all the
places that it is shown and make a spectrum add itself to a plot – this is how you view
spectra.
You can also do things like change the look and feel of the whole application (there are different colour and font schemes), perform some quite primitive mathematical operations on or between the spectra, run through an animated display sequence of some or all of the spectra, set the spectra coordinate systems and modify/inspect their values. So things that apply to each spectrum, wherever it is shown, or the program as a whole are generally done in this window.
To open your first spectrum select the Open item in the File menu. This will create a familiar open file dialogue window. Just navigate to your spectrum, select it, and press Open to proceed.
Alternatively you could have supplied the spectrum you want to use on the command-line:
Which will read the spectrum stored in the named file. SPLAT-VO will read spectra stored in most astronomical formats (Starlink NDF, FITS spectra and tables, VOTables, simple TEXT files).
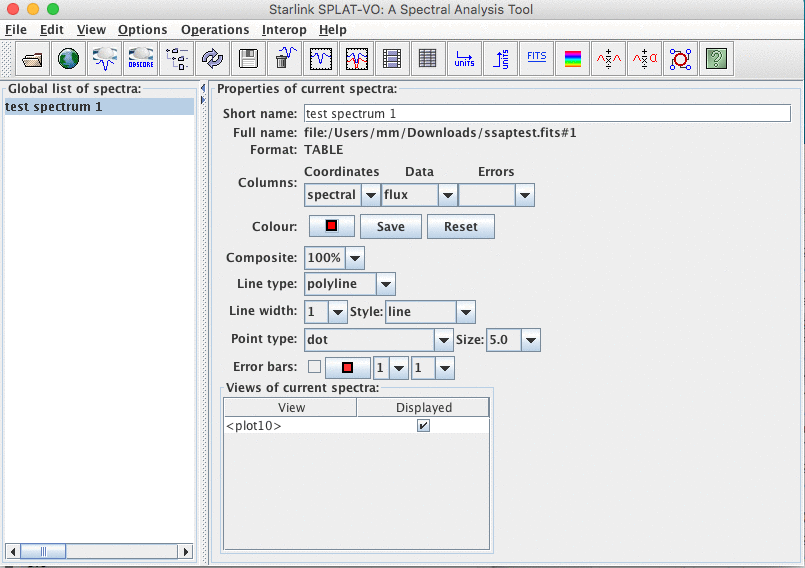
Now that you’ve actually read in a spectrum it will be immediately displayed in a ‘plot’. Have a look at this plot window briefly, if you want, but close it before proceeding (to close it select the Close item in its File menu). You really need to understand how to display a spectrum in a plot yourself, if you’re to gain complete control over the creation of plots and what they display.
The browser window (once again on its own) should now appear something like:
Now to re-create a plot and display a spectrum in it the hard way. Actually this couldn’t
be simpler, just ‘double click’ on the name in the Global list of spectra. Another way to
achieve the same effect is to select the name (by just clicking on it once, you can tell it’s
selected when it becomes highlighted, as shown above) and choose the display selected
spectra button in the toolbar. This is the button that looks like  (it’s meant to represent
a spectrum with axes drawn in a plot). If you’re successful then a window looking like
this:
(it’s meant to represent
a spectrum with axes drawn in a plot). If you’re successful then a window looking like
this:
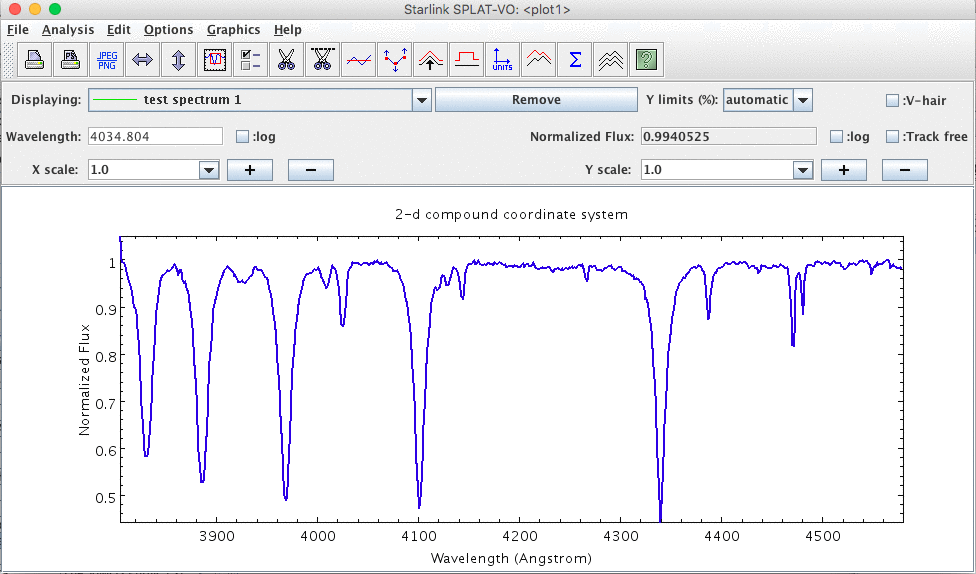
should appear as before.
Since SPLAT-VO is meant to be capable of displaying many spectra (sometimes in the same plot as we’ll see in the next section), you should confirm this by creating a second plot window, by just performing the same operation again (i.e. double click on the spectrum name).
Displaying many spectra at the same time isn’t much more difficult than the single spectrum case. Just open up several spectra by giving their names on the command-line, or by opening them using the File->Open dialogue. This will produce a main window that looks something like:
If you’ve opened all the spectra at once (you can do this using the File->Open dialogue by selecting more than one file – just hold down the shift key while selecting each one) then they will have also all appeared displayed in a single plot, which should look something like:
Again you should now close the plot (or all the plots if you’ve opened the spectra one-by-one) so you can find out how to add spectra to plots manually.
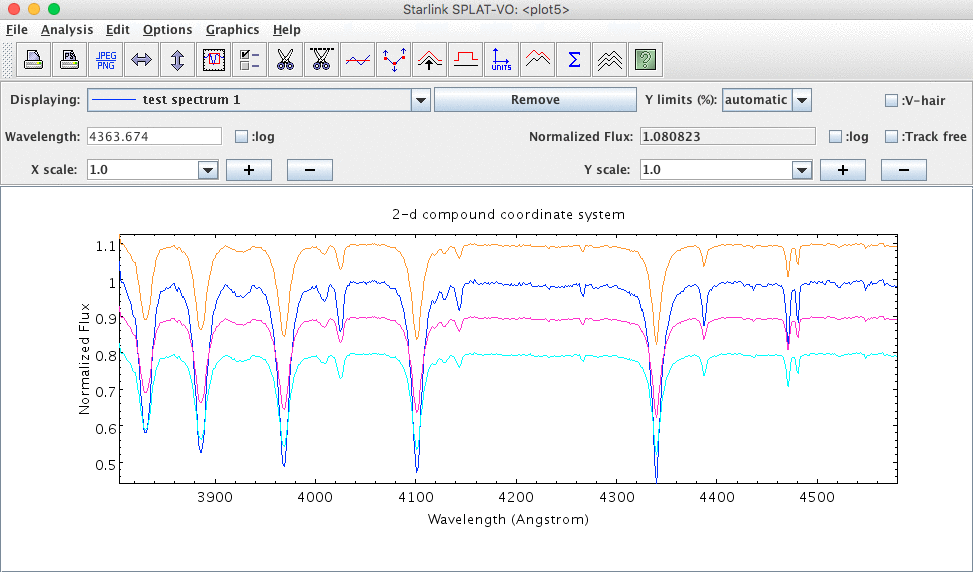
There are three ways to display a set of spectra in a single plot, you can either open a plot just displaying one spectrum and then add the others one-by-one, by two different methods, or you can open a plot displaying a pre-selected list of spectra. Let’s cover the latter option first.
The first thing to do is identify which spectra you want to display in the same plot, you do this by selecting their names in the Global list of spectra: list. You can select more than one name at a time by holding down the control key, while clicking on the name. It’s also possible to select ranges of names by selecting the first name and then selecting the last name while holding down the shift key. Have a play to see the effects that you can get with combinations of these (hint: using the control key also allows you to remove single names from the selection). To select all the names you can also use the Edit->Select all spectra menu item.
Now that you’ve selected the spectra to display, just press the multi-display button:  and all the
spectra will be displayed in a single plot. Note that if you inadvertently press the single display
button: , then each spectrum will appear in a plot of it’s own (this can be a very bad idea if you
have a very large number of spectra selected!).
and all the
spectra will be displayed in a single plot. Note that if you inadvertently press the single display
button: , then each spectrum will appear in a plot of it’s own (this can be a very bad idea if you
have a very large number of spectra selected!).
If you don’t like the colours chosen for your spectra you can just press the auto-colour button:  to
get a new set. Each press of this button should generate a new set of colours, so just keep clicking until
you see a combination that you like.
to
get a new set. Each press of this button should generate a new set of colours, so just keep clicking until
you see a combination that you like.
The second method for adding more than one spectrum to a plot is the simplest, you can drag spectra from the Global list of spectra: and drop them into the display area of the plot. To drag a single spectrum just make sure that it is selected and then attempt to drag it from the Global list of spectra: into the plot (during dragging a document icon should be attached to your screen pointer). To drag more than one you just need to make all the spectra you want displayed selected and then attempt to drag any of the selected set.
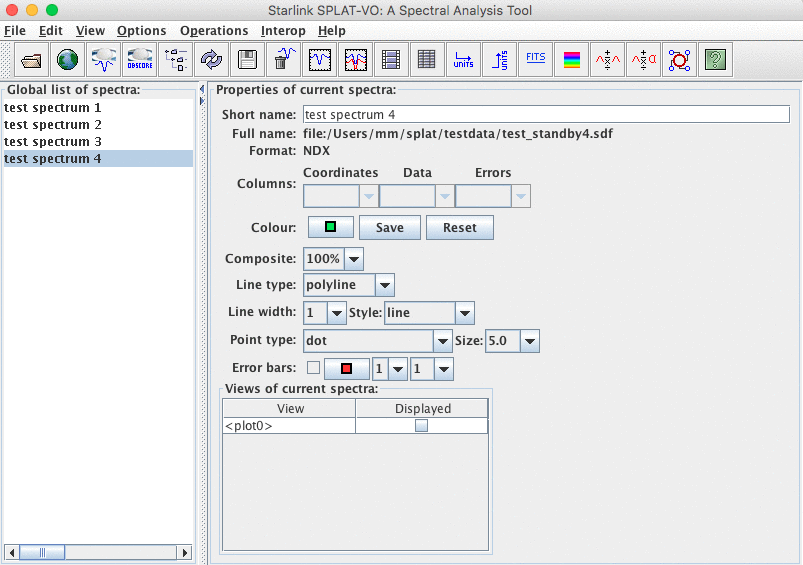
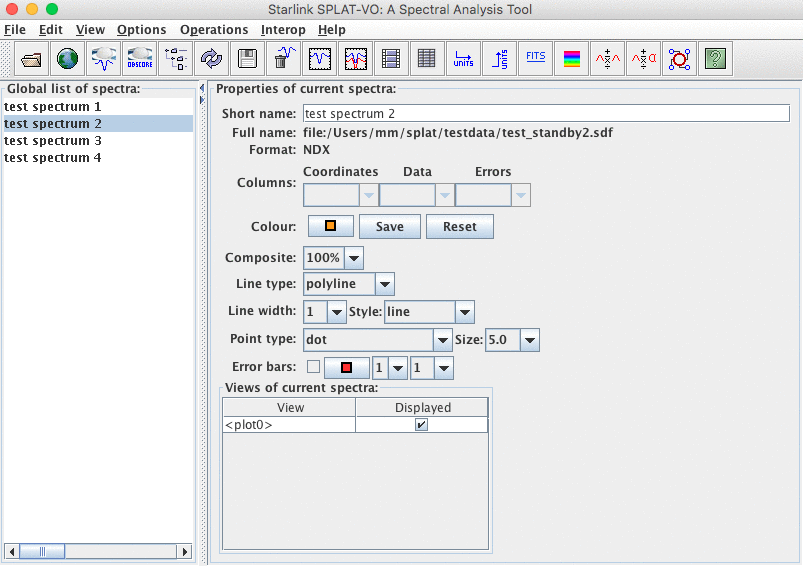
The third method is actually also the method you’d use to remove a spectrum from a plot. The first thing to do is select a spectrum in the Global list of spectra:, this shows its properties in the Properties of current spectra: side of the browser window, including which views are being made (i.e. which plots are displaying it).
If you click on one of the displayed spectra on a plot, the respective entry in the Global list of spectra: will be highlighted. By clicking on an entry at the Global list of spectra:, the respective plotted spectrum will blink a few times (if it’s plotted).
To add or remove a spectrum from a plot you need to click on the square shown in the Displayed
column, so that it becomes ticked or unticked. See in the following image that test spectrum 2 is
currently being displayed in <plot0>:
If any spectra were not displayed in this plot then they could be added to it using this mechanism. Naturally this also extends to the case when there are many plots available.
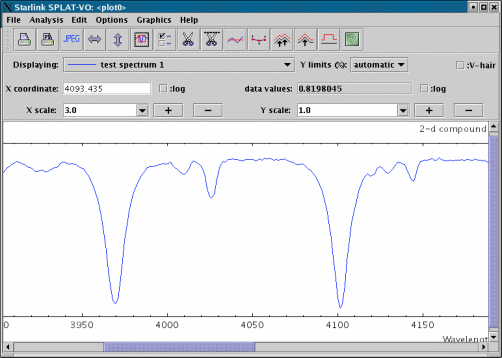
The final part of this introduction is to zoom and scroll the spectrum, so, for instance, you can inspect individual lines and read off accurate coordinates (this is after all the main purpose of SPLAT-VO).
Zooming of a plot is controlled by the X scale: and Y scale: controls. To adjust the zoom you may
either select a value from the drop-down lists, or you may type in a value and press <Return>. Values
may be non-integer, but should be one or more.
Once you have zoomed the plot scrollbars should appear at the bottom and maybe to the right (these appear when the size of the plot becomes larger than its visible size). Just drag the slider from side-to-side or up-and-down to view the part of the plot that you want to see.
A useful shortcut for zooming is to drag out a region using the middle mouse button. Just place your cursor on the plot, press the middle button and, keeping the button depressed, move the mouse until the rubber-band rectangle encloses the feature you want to zoom on. You can also zoom in by an increment of one in X and Y by pressing the middle button and just releasing it.
If you find that the figure is zoomed so much that you’re having difficulty recognising the features, then there are several things that you can do.
The first is to resize the plot so that it has a scale of 1 in X or Y. That’s what the toolbar buttons that
appear as  and
and  do, make the plot scale its displayed spectra to fit the visible width or
height. Note: These buttons are very useful when a plot seems to be displaying nothing or
reports that the plot has no size etc., they are your best friends, press them a lot in such
circumstances.
do, make the plot scale its displayed spectra to fit the visible width or
height. Note: These buttons are very useful when a plot seems to be displaying nothing or
reports that the plot has no size etc., they are your best friends, press them a lot in such
circumstances.
If what you really want to do is remain zoomed but quickly go to a given wavelength, then all you
need to do is type in the wavelength in the X-coordinate readout entry field (labelled Wavelength
above), press <Return> and the plot will be centred (or brought into the edge of the field of
view).
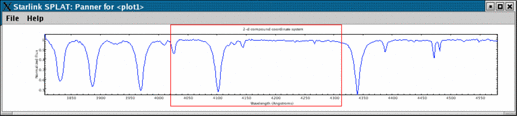
If what you’d really like is a smaller view of the whole plot to work from, then press the  button,
this will pop-up the ‘panner’. This shows a red rectangle over a view of the full unzoomed plot
(shown in the same aspect ratio as the full plot at the current scale factors). To move the rectangle, and
hence the view shown in the plot, just point somewhere in the panner and press the left mouse button,
or ‘drag’ the rectangle itself.
button,
this will pop-up the ‘panner’. This shows a red rectangle over a view of the full unzoomed plot
(shown in the same aspect ratio as the full plot at the current scale factors). To move the rectangle, and
hence the view shown in the plot, just point somewhere in the panner and press the left mouse button,
or ‘drag’ the rectangle itself.
If the panner view seems very small, as can happen when you’re using a high X scale factor, then try resizing the window to get a better fit to the aspect ratio (hint: make it taller).